Monday, December 23, 2013

Crochet Can Cozy: A Hunter's Dream

Almost Christmas and Im still working on gifts for the family. Yes I admit I am a procrastinator. Today I'm whipping up some of my Basic Can Cozy's for my Dad and Step Father. You can find the pattern in my etsy store, Basic Can Cozy Pattern.

I'm doing two cozies each and making it hunting themed. Repeat Crafter Me has an adorable Crochet Reindeer Applique Pattern that I used on a solid color cozy. The Other one I did was with a camo colored yarn. Here's the finished Reindeer one, I used a cotton sugar & lilly yarn for this!

Of course I'm giving this with a six pack of their favorite beer!


Here's two camo ones I did in the past, His & Her Camo Red Heart Brand!


What do you all think?

Wednesday, December 18, 2013

Basic Crochet Beanie Pattern 6-12 month old

Hello all, Sorry I have been MIA for so long now! My crocheting business has taken off and on top of staying home with a very active 1 year old (growing so fast!!) I have barely had time to think!

I wanted to stop in and wish you all Happy Holidays and share my basic beanie pattern for a 6-12 month old, I use this for all of my hats! A little late to use for gifts but I hope it's of some use to you all.

6-12 month Beanie
Red Heart Yarn
Hook I9/5.5mm

Row 1: MR 10 HDC, close SL ST to first, in black
Row 2: HDC 2 in each around (20)
Row 3: *HDC, HDC 2 in next* x10 (30)
Row 4: *HDC in next two, HDC 2 in next* x10 (40)
Row 5: *HDC in next three, HDC 2 in next* x10 (50)
Row 6: *HDC in next 24, HDC 2 in next* (52)

Row 7-17: HDC around. CH 2 (52) FO

Heres a few finished products! All of these were made with that basic Beanie pattern:


If you are not a crocheter and are looking for a handmade hat in your size stop on into my Facebook page and take a look! https://www.facebook.com/SkyesLoopyCreations

Any questions on the pattern just ask and I will help you the best I can. Enjoy!

Monday, September 16, 2013

Autumn Wreath

Cool mornings, leaves falling, beautiful reds and yellows... It's official Fall is here!

I decided to give making a wreath a try for this season! I remember seeing a pin somewhere for a wreath with burlap or fabric stuck into a foam circle. So I decided to try one like that and after a trip to the craft store I had all the materials ready. However the project took a turn from what I had thought up but turned out even better then I had imagined.


I already had plenty of burlap left over from the wedding and the hot glue guns. When I went to get the burlap I saw some pretty fall looking fabric I got from a sale awhile back and thought why not! So here is what you need:

floral wreath foam circle
Fall flowers (optional)
hot glue & gun
fabric or burlap, Id say I used about 1/2 a yard
ribbon (optional)


First step is to cut the burlap and fabric into squares about 2 inch by 2 inch. Depending on how tight you want the "ruffle" side to look depends on how many squares you need. You can either make the entire wreath ruffled or you can do half like I did. It will make the ruffled half heavier then the rest so it tips a little once you hang it.

Use the tips of the scissors to put holes in the foam circle then put a drop of hot glue into the hole. Wrap the fabric around the tip of the scissors and push fabric or burlap into hole. Continue this until you have the desired look. I mixed in some fabric squares with the burlap ones.


If you choose to only do partial you can then wrap the rest in fabric or burlap like below.


After adding the leaves and pumpkin (which took a lot of hot glue) it turned out pretty darn good!!


Thursday, September 12, 2013

Minion Coffe Cup Sleeve Crochet Pattern

I am totally in love with the minions from Despicable Me. So I decided to make my very own cup sleeve for the paper cups you get your takeout coffee in.  It only took me maybe a total of two hours and thats with a few stops to tend to the little eggplant! I hope you all think he is as cute as I do!

You could also do the hair differently and even make two eyes instead of one. The great thing is how many ways you can change it up once you have the basic sleeve.


Need:
blue yarn (like a jean color)
yellow yarn
black yarn
white yarn
gray yarn
G needle


CH - Chain
SL ST - Slip Stitch
HDC - Half double crochet
FO - Finish Off
HDC Increase - HDC twice in same stitch
SC - single crochet
MR - Magic Ring

Sleeve
CH 30 in blue yarn
SL ST ch together to form circle, ch1
HDC around (30) HDC, SL ST to first stitch
change to yellow yarn, HDC increase, HDC around SL ST to first stitch,  31 HDC
HDC around x3, SL ST to first stitch at end of each round
change to black, HDC around, SL ST to first HDC
change back to yellow, HDC around x3, SL ST to first stitch at end of each round
FO

Eye (s)
MR, SC 5 in black
change to white, HDC Increase in each SC around, 10
Change to grey SC, SC increase in next around, FO 15
sew onto sleeve


Sew the mouth however you want your minion to look. Keep him bald or add a little bit of hair but make him your own! Enjoy on a cup full of hot yummy coffee (or pumpkin spice latte which is what I am getting ASAP). =]

Baby Finger Food Error & Solution: Banana & Wheat Germ

Hey guys! So my little eggplant is now 9 months old! As he grows he is becoming more independent. So we are now introducing some finger foods to his diet, today was banana's. Well i learned very quickly that all they did was slid around on his high chair tray, which he enjoyed immensely but was still fussing for food.


So as I was going to grab some pureed food and do it the old fashioned way when I saw the box of wheat germ I just bought and figured why not? I chopped the banana slices into 3rd's tossed them in a small amount of the wheat germ, just enough to cover, and gave to to the little one. I used untoasted, all natural wheat germ that I got at Weis for $1.99 a box!


He loved it! Still made a mess but he ate them like crazy and was super happy. A easy fix, too! Hope your little ones enjoy!


Monday, August 19, 2013

In Loving Memory

Sorry for going MIA this past month. We lost my baby brother on July 16 in an unexpected motorcycle accident and I have not had much drive to work on crafts or wedding things. Which I am now kicking myself for, 5 days to go and so much to do! He was 22, would have been 23 on August 31, and a great guy all around. We held his funeral on July 20th and the funeral home was packed full to where people couldn't even come into the building. 

Since the passing of my brother came so close to the exchange of our vows and reception I decided to put together a small "In Loving Memory" table. We will have pictures of the family member's we lost as well as a candle and little saying typed out. 

I went to Frans Candles and looked through the verses and poems until I found something I liked. I have typed it up on put it into a frame. Heres what it says:


Today we pause to reflect upon

those who have shaped our character,

molded our spirits and touched our hearts.

May the lighting of this candle be a

reminder of the memories we have shared,

a representation of the everlasting

impact you have made upon our lives.


I took a mason jar, frame, and nice decorative bottle and spruced them up a little bit with some lace and twine to keep with the country/vintage feel of the wedding. 


For the frame I hot glued the twine around the frame in a indented part, I did five rows or until the indented part was filled completely. For the mason jar I choose a wide piece of lace and hot glued it to the jar then did a few rows of twine. For the candle holder/decorative bottle I hot glued a few rows of the twine at the top and stuck a candle in.


The flowers in the mason jar is dried baby's breath covered with glitter. It makes a huge mess but so pretty!


I hope you all like the idea and if your looking for ideas I hope you find a verse or poem that fits for your loved one from Frans Candles Memorial Verses.


Tuesday, July 16, 2013

Cayenne Lime Mushrooms

So I am trying to eat healthier during the day instead of snacking all day. I stay home with my son and am very picky about what he eats but lately I've been letting myself snack away. When he gets older how am I supposed to tell him no while I am doing it myself right? So for my "snack" today I decided on mushrooms but didn't want to eat them raw.

Here's what I came up with! Cayenne Lime Mushrooms


I squeezed half a lime into a frying pan and added a drop of olive oil. Tossed in the mushrooms and sprinkled minced garlic and cayenne and cooked until soft with a lid over it. I didn't measure anything out but the cayenne is strong so only use a little unless you like it hot.

It turned out amazing for me! Enjoy

Monday, July 8, 2013

Small Crochet Sunflower (Pattern included)

Our "real" wedding ceremony will be August 24 with a large reception. We live on an adorable farmette with a few acres of land, What better place to have our wedding right? So we are trying to keep the price as low as possible while making it the wedding of our dreams, the normal goal of every bride and groom.

I figured I can crochet roses so how hard can making my own sunflowers for the wedding be? Turns out not that hard at all! Thanks to my bridesmaid/best friend she has made this super easy by doing the normal size sunflowers and Im making the small ones.

I used Coats Crafts Sunflower Crochet Pattern to make the normal sized sunflowers for my centerpieces and bouquet for my wedding. I used Simply Soft yarn to make them and had to use fabric stiffener to keep the petals from curling up since the yarn is so thin.

I also needed some smaller sunflowers that looked just like the bigger ones. So I adjusted the Coats Crafts pattern to fit what I needed. There are a few differences from the pattern: its smaller, a different needle/yarn size, and instead of using the piece of cardboard for the centerpiece I used a bit of stuffing to make it "puffy."

Here's the pattern, let me know if you have any questions!

Center (brown)
Piece #1
SC 8 in Magic Ring
2 sc in each sc, 16 sc around.
Finish off

Piece #2

SC 8 in Magic Ring 
2sc in each sc, 16 sc around
SC piece #1 to Piece #2, 16 sc
Stuff the inside with a little bit of stuffing before SC all the way around
finish off


Petals (yellow)
SC in SC of center piece
ch 6
SC in second from chain, DC in next 3, sc in last slip stich in next sc in center piece
repeat step 2 & 3 around, should have 16 petals
Finish off


The end project will look like this, this is both the normal size and smaller one.


Sunday, July 7, 2013

DIY "Redneck" Wineglasses

So our favors for the wedding is mason jar drinking glasses. So I wanted to pick up some "Redneck Wineglasses" the bridal party. However in the store they run about $20 for a set and we are trying to save anyway we can. So how hard can it be to make them  myself!

I picked up two candle stick holders from the dollar store, used some mason jars from our favors, and picked up a thing of Loctite super glue. The mason jars are $9.99 for a case of 12 (about $.85 for one), $2 for both candle sticks, and about $3 for the super glue. So lets just call it $4 to make one!

The great thing about the loctite super glue is that it is clear and you wont see a yellow circle in between the two. And who doesn't love a mason jar as a drinking glass!

All you do is put a circle of glue on the bottom of the mason jar and a line around the top of the candle stick. Let sit for a minute before connecting the two. Place the candle stick onto the mason jar and leave sitting for 24 hours. Tada! Heres the finished product!


Monday, May 27, 2013

Book Club: "Rising Tide" by Lynn Steigleder *Spoiler*

I have recently started a book club in my area and was contacted by a local author prompting his book. I am all about supporting local authors and accepted a copy of his book. We scheduled the first meeting for this past friday and started reading "Rising Tide". Oh boy did we have a hard time reading this book.

"Rising Tide" is a fiction book based before the start of the new world. It is one of three books with Ryan "Adam" and Eve. It starts out at the end of the world and beginning the new world with Adam and Eve. The back of the book does not describe what the book is actually about at all and is very misleading.

The group agreed that we did not care for this book. We all felt that he did not do a great job of mixing religion and sci fi and that it felt more like a rough draft then an actual book. It had a great idea going just not perfectly executed and missed a lot of detail of the characters. We all agreed if he had given his idea to a different author with more detail that the book had a chance at being really good.

Now I am one for Love stories but not when it happens with in a minute of meeting someone. I was very disappointed by that aspect and even more so that they were married within a day of meeting each other. Even worse they killed of the only character that you actually start to like!

I don't want to ruin your choice to read it, something I don't like you might. However I would not suggest this book to any of my friends. Here is some reviews on Good Reads that you can take a look at! If you do decide to read this book I hope you enjoy it more then I did.

Our next book will be "The Immortal Life of Henrietta Lacks" by Rebecca Skloot. The first few chapters have started out great so hopefully I will have a better review for you!

Friday, May 24, 2013

Wedding Decorations: Down the Aisle

I am totally and absolutely addicted to Pinterst. There I said it. Too bad it doesn't fix anything!

That being said here is another idea I found on pinterst for my wedding. I found this great aisle decoration idea on weddingchicks blog and added my own flair to it to make make it unique!

The best part of this idea? I got to have a reason to drink 10 bottles of wine and no not all in one night, as tempting as that might be.

Our wedding colors are royal blue and yellow so I found Bartenura Moscato with a beautiful blue bottle. Made some burlap roses and some crocheted sunflowers and bought some sparkly preserved baby's breath from afloral.com. Here is what it looks like =]

Front

Back

Flowers

We will put it at the end of each row of chairs for the ceremony and then move it up to the the parking area for guests to walk through when they arrive. I think we will put them in the ground like the blog shows. Will have the pictures in august! Hope you guys like =]

Thursday, May 23, 2013

DIY Workout Shirt

I am part of a meetup group that gets together and does different pintert pins. For the events we make a recipe we have pinned on pinterst and make a craft we have also pinned. Our upcoming event is to repurpose a old T-shirt. So it got my mind wondering and I decided to do something ahead of time. 

Here comes the new work shirt I have now made two of! I found this pin on pinterst but I can't seem to find the original source so I had to twist it up and figure it out on my own, heres what I have (ignore the nasty hair, just came from the gym!).

All you need is a pair of scissors, hot glue gun, ribbon, and a old T-shirt.

Front

Back
And it was very easy and quick, only took about a half hour. First find a T-shirt that is a little large on you. Then cut the sleeves, neck and bottom off as shown below.


Flip to the back of the shirt. The gray spot is the part you cut off the shirt to make the open back.


Instead of the huge bow on the link I posted above I cut 5 or 6 slices of thin ribbon I had on hand, or you can pick up thick ribbon. I hot glued the 5 or 6 ribbons together to make a think and sturdy piece that looks like this.


Then you can wrap around the arm pieces and hot glue in a few places until all the ribbon is wrapped.


Thats it! Try on your shirt and adjust the ribbon to wear you want it and your ready to work out. Makes a nice breezy and hip workout shirt. 


Sunday, May 19, 2013

Wedding Favors: Kids Part 1

I have a cute country theme going for our wedding in August. Which consists of burlap, lace, and of course mason jars! So for the favors we will having mason jars as drinking glasses. For the kids favors I am putting coloring pages and crayons in the glasses. We will have lawn games but I wanted something special for the kiddos.

Here is the cute crayon holder I came up with. Thought it was nicer then tossing some crayons in a jar.


You will need about 1/4 yard of burlap, crayons, siscors, hot glue gun and glue sticks, and ribbon to match your wedding colors.


I laid the crayons on the burlap to see how big I needed to cut it. When I went to Joann's for the burlap I learned and easy way to cut a straight line in the burlap. You pull the string out at the exact spot you want to cut it then cut on the gap it left, will look like below. Keeps the line straight and helps it from fraying.


Go ahead and cut all the burlap to the size you need it. Plug in the glue gun and let it warm up. The pieces should look like this.


Put a line of glue on both sides of the burlap about halfway down, fold bottom up and gently press side together. The glue will come out of the holes in the burlap so be careful, its will burn!


Let the hot glue dry and put the crayons into the pouch. I used yellow and blue ribbon since they are my wedding colors but you can use any colors or types of ribbon you'd like. Double knot the ribbon around the punch and put a drop of hot glue on the knot. Attach knot to pouch. This will keep it from moving or falling off the pouch. Tie the ribbon into a bow and your done! Its a cute pouch that adds the special attention you expect to see at a wedding.


Hope you enjoy! 

Thursday, May 16, 2013

Sweet Tater "Chips" and BBQ Casserole

So I seem to have a theme going when it comes to my recipe posts, always using something up before it goes bad. I love to have fresh veggies on hand but never seem to use them before they go bad! Must be all the awesome sales the grocery store has on their vegetables, I go a little wild.

So that being said I had to hurry up and use some asparagus and corn before it went bad, gave it about another day. I had also set some ground beef out for dinner but wasn't feeling the quick go to hamburger helper.

What perfect timing, my next issue of Parenting came in and had some quick recipe ideas to spice up mac and cheese. My wheels started turning. They had one that added roasted butternut squash which lead to the Sweet Tater "Chips." There was also one called Cowboy's Choice with bacon, onions, and scallions, which lead to my BBQ Casserole. 

For the sweet tater "Chips" I didn't do much spice since I love the natural flavor of sweet potatoes. I call them chips with parenthesis since they aren't the normal crunchy you think of when you hear the word chips. If you want more flavor you can just double up on the amounts below. I used size two in the mandolin slicer. If you slice the chips thin in spots they will burn a bit so try to slice as even as possible.

The BBQ casserole has all the joys of a backyard BBQ! The burger, BBQ, veggies, and pasta. You could even make this with out baking it as a pasta salad, just mix in bread crumbs! The husband couldn't even taste the Red Hot but I could and cut it back in the recipe below, if you want a bit more heat I would double it.


Sweet potato "Chips"(serves two)
2 sweet potatoes
1 tablespoon olive oil
1/2 teaspoon oregano
1/4 teaspoon garlic

preheat oven to 400
Slice sweet potatoes on a mandolin, watch your fingers!
Toss in bowl with olive oil, oregano, garlic.
Lay flat on baking sheet, might have to do two batches
Bake for 10 min


BBQ Casserole (serves at least 6)
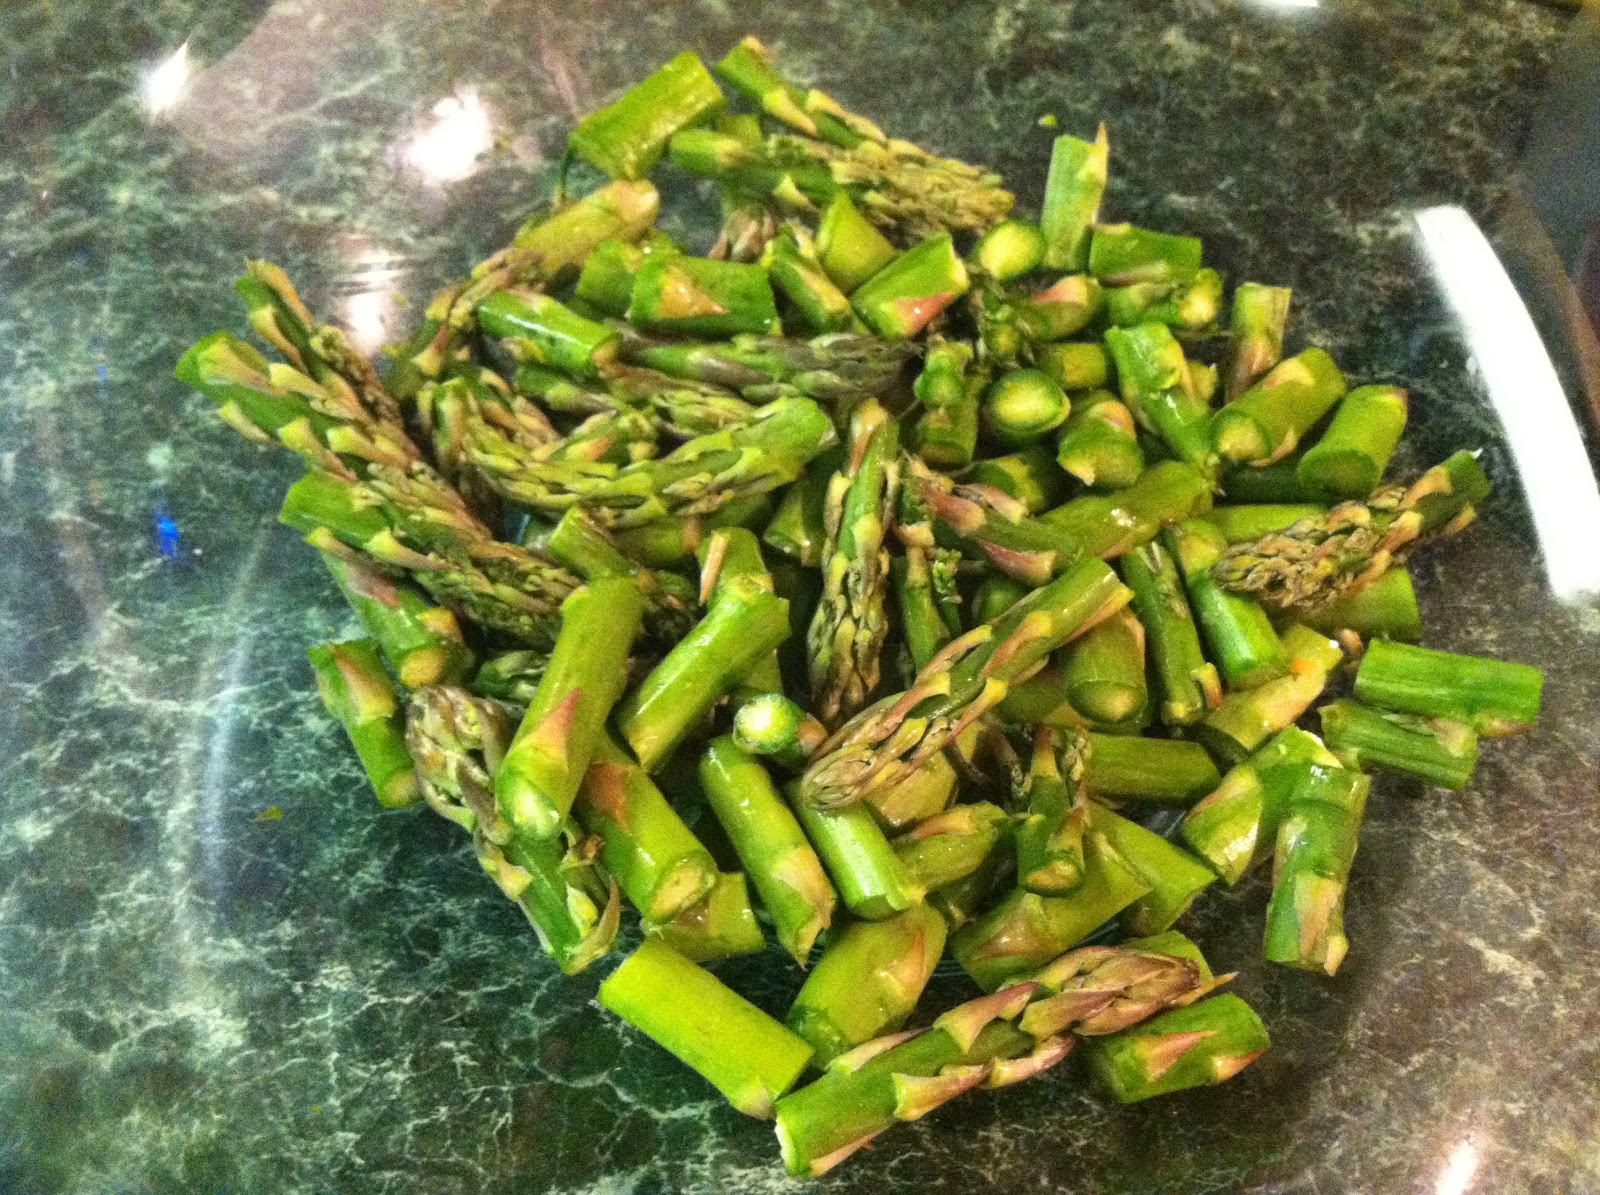
small bunch of asparagus
5 mini sweet peppers (if your local store does not have a small red pepper would be fine)
1 box noodle (I used garden delight Rotini)
1 pound ground beef
3 cloves garlic, sliced/minced
1/2 cup favorite BBQ (I used Sticky Fingers Sweet Carolina)
1/4 cup ketchup
1/8 cup red hot (we only had the buffalo wing sauce on hand)
1/4 cup ranch
1/2 cup bread crumbs
1 tablespoon worchestshire
generous grind of steakhouse seasoning

Cut asparagus in small bite size pieces, throw into boiling water for two minutes. Take out of boiling water and blanch in a bowl of ice water. Toss into large bowl and set aside.
Boil noodles until cooked. Drain and rinse with cold water, put in same bowl as asparagus.
Brown ground beef, sliced/minced garlic, seasoning, and mini sweet pepper. Drain grease and put in bowl with other ingredients.
Mix BBQ sauce, ketchup, red hot, ranch, and worchestshire in a small bowl. Add sauce mixture to big bowl.
Put salad into casserole dish, top with bread crumb. Bake for 15 minutes covered, uncover and bake for 5 minutes more.


This is the seasoning I added to the burger mixture


I had added cheese but decided it wasn't so good! Trial and error...

Yum Yum